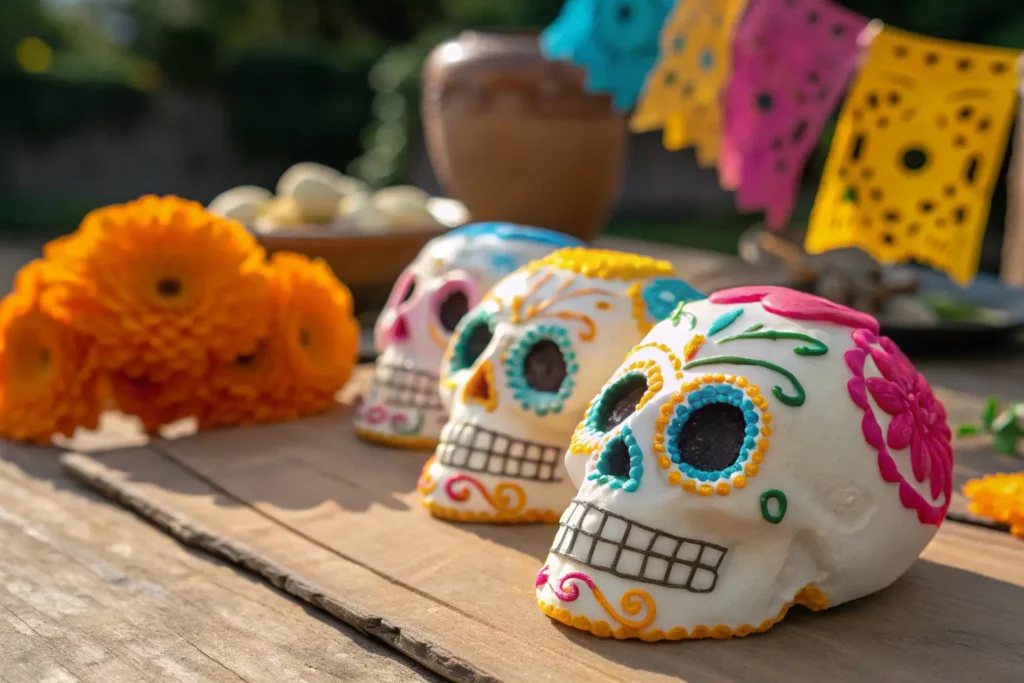
Calaveras de Azúcar — known in English as sugar skulls — are colorful, ornate skulls made from sugar and decorated with icing, foil, beads, and bright patterns. They are a central part of Día de los Muertos (Day of the Dead) altars and celebrations, honoring loved ones who have passed. If you’re a beginner or home cook in the USA curious about making edible sugar skulls for a cultural celebration, classroom project, or Halloween treat, this guide walks you through everything: the meaning behind the skulls, supplies and ingredients, a detailed recipe, decorating techniques, SEO-friendly tips to promote your creation online, and visual prompts for generating images. Let’s make beautiful, respectful, and delicious Calaveras de Azúcar together.
Table of Contents
- History & Cultural Significance
- Traditional vs. Modern Sugar Skulls
- Safety & Cultural Respect
- Ingredients & Tools (shopping list)
- Step-by-step Sugar Skull Recipe (detailed)
- Icing & Decoration Techniques
- Edible Alternatives & Variations
- Troubleshooting & Tips
- Storage & Shelf Life
- SEO & Social Sharing Tips (LSI/NLP keywords, Pinterest pins, hashtags)
- 3 MidJourney prompts for images
- FAQ
- Conclusion & Call to Action
History & Cultural Significance
What are Calaveras de Azúcar?
Calaveras de Azúcar are handcrafted skulls made primarily from granulated sugar and a small amount of water and meringue powder (or egg whites in traditional recipes). They are decorated with brightly colored icings, foil (papel aluminio), sequins, and inscriptions of the deceased’s name when placed on altars (ofrendas).
Why are they important to Día de los Muertos?
Día de los Muertos, celebrated on November 1–2, blends indigenous Mexican beliefs with Catholic traditions. Sugar skulls represent the sweetness of life and the acceptance of death as a natural part of the human cycle. They are joyful, not morbid — decorated playfully to honor and remember loved ones. When making and using sugar skulls, it’s important to approach the tradition with respect and awareness of cultural meaning.
Traditional vs. Modern Sugar Skulls
Traditional sugar skulls are primarily decorative and sometimes edible but made mainly for display on altars. Modern home cooks often create edible versions for parties, classroom projects, bake sales, or family gatherings. You can choose to keep your skulls fully edible (food-safe decorations and icings) or make display-only skulls using non-edible craft elements. This guide focuses on edible, food-safe Calaveras de Azúcar for beginners and home cooks in the USA.
Safety & Cultural Respect
- Respect the origin: Acknowledge the Mexican origins of sugar skulls and use them with sensitivity, especially in multicultural or educational contexts. Explain the tradition if sharing at a party or classroom.
- Label non-edible parts: If you add non-food decorations (wires, beads), mark them clearly to avoid accidental ingestion.
- Allergies: Use pasteurized egg whites or meringue powder if concerned about raw eggs; always list ingredients for guests.
- Food safety: Keep decorated skulls in a dry, cool place. Avoid humidity, which causes sugar to soften.
Ingredients & Tools (Shopping List)
Ingredients
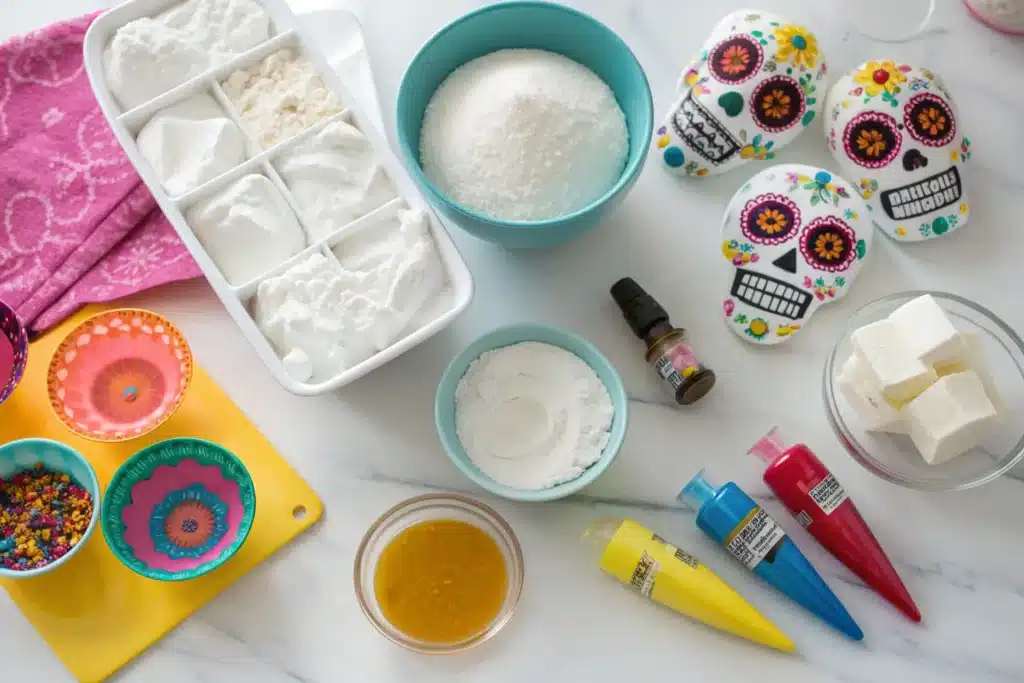
- 3 cups granulated sugar (about 600 g)
- 3 teaspoons meringue powder (or 2 large pasteurized egg whites)
- 3 tablespoons water (approx. — add carefully)
- Gel food coloring (various colors)
- Confectioners’ sugar (for royal icing)
- Lemon juice or vanilla extract (optional, for flavor)
- Edible metallic leaf or luster dust (optional)
- Edible markers (for writing names)
Tools & Equipment
- Sugar skull molds (plastic or silicone skull molds) or DIY cardboard molds
- Mixing bowls (medium and large)
- Electric hand mixer or stand mixer (for icing)
- Piping bags and tips (small round tips #1–#3)
- Palette knife or small spatula
- Measuring cups and spoons (US standard)
- Sifter for powdered sugar
- Wax paper or parchment paper
- Cooling rack (optional)
- Small paintbrush for edible dust
- Food-safe gloves (optional)
Step-by-step Sugar Skull Recipe (Detailed)
This recipe yields multiple small-to-medium sugar skulls depending on your molds. It’s written for beginners and home cooks in the USA, using commonly available ingredients.
Prep time: 20 minutes
Mold & drying time: 6–12 hours (or overnight)
Yield: 6–12 skulls (depending on size of molds)
Step 1 — Prepare your workspace
Clear a clean, dry surface. Sugar attracts moisture — work in a low-humidity room. Lay out wax paper to rest finished molds.
Step 2 — Mix dry ingredients
In a large bowl, sift 3 cups granulated sugar to remove lumps. Add 3 teaspoons meringue powder and whisk to combine thoroughly. Meringue powder stabilizes the sugar mixture and helps set the skulls hard.
Step 3 — Add water carefully
Add water teaspoon by teaspoon (about 3 tablespoons total), stirring continuously with a spoon or your hand (wear gloves). The mixture should clump together when pressed but not be wet or sticky. If it becomes too wet, add a tablespoon of granulated sugar at a time until you get a moldable consistency.
Step 4 — Pack the molds
Spoon or press the sugar mixture into the skull molds. Pack firmly and press with the back of a spoon or a small tamper so there are no air pockets. Overfill slightly and then scrape the top flat with a palette knife.
Step 5 — Unmold and dry
Flip the mold onto a tray lined with wax paper and gently tap to release. If using two-piece molds, press both halves together and carefully separate after 10–15 minutes. Allow skulls to dry in a cool, dry place for at least 6–12 hours or overnight. For thicker or larger skulls, 24 hours may be necessary. Avoid humid environments; if your kitchen is humid, consider using a dehumidifier or drying in an air-conditioned room.
Step 6 — Make royal icing for decorating
While skulls dry, prepare royal icing. In a mixing bowl, combine 3 cups powdered sugar, 2 tablespoons meringue powder (or 1 pasteurized egg white), and 3–4 tablespoons water. Beat on low and then medium-high until stiff peaks form (5–7 minutes in a stand mixer). The icing should hold its shape but still be pipeable. Divide into separate bowls and add gel food coloring for bright colors. Transfer to piping bags with small round tips.
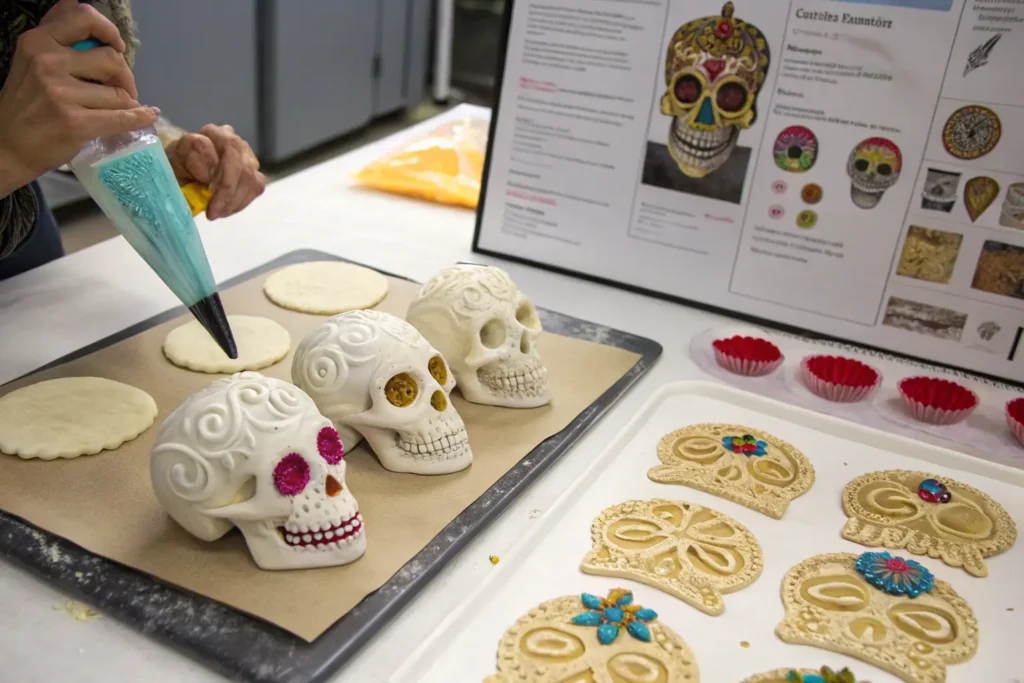
Step 7 — Base decoration
Start by outlining the skull with a thin line of white or colored icing — this helps create a border and prevents flooding. Fill larger areas using thicker or slightly thinned icing, depending on your design. Use a toothpick or a small tool to move icing into tight corners. Allow base layers to dry 10–20 minutes.
Step 8 — Add details
Use contrasting icing colors to draw eyes (flowers, hearts, or circles), nose (upside-down heart), teeth lines, and decorative swirls. Add edible accents like nonpareils, edible pearls, or small candy pieces while icing is wet so they stick. For metallic accents, apply edible luster dust with a dry brush after icing dries.
Step 9 — Personalize
If using skulls for an ofrenda or memory table, write names on the forehead with an edible marker or dark icing. For classroom projects, encourage kids to draw playful faces and patterns.
Step 10 — Final drying & storage
Let decorated skulls dry completely (4–6 hours or overnight for icing to fully set). Store in a cool, dry place in an airtight container with parchment layers between skulls to prevent sticking. Do not refrigerate (humidity will cause them to soften).
Icing & Decoration Techniques
Royal icing consistency guide
- Flood consistency: thin, used to fill large areas (thin with a few drops of water).
- Piping consistency: medium-thick, for outlines and controlled lines.
- Stiff consistency: for 3D details and flowers.
Decorating ideas
- Flower eyes (marigold or daisy patterns)
- Filigree swirls and dots
- Geometric forehead designs
- Candy teeth or painted gold teeth (edible gold dust)
- Monogram names on the forehead
- Use edible glitter for a festive sparkle
Kid-friendly decorating
Prepare small bowls of colored icings and edible sprinkles. Have pre-made skulls for kids to decorate so they can enjoy the art without waiting for a long drying time.
Edible Alternatives & Variations
- Chocolate skulls: Use molds with melted chocolate. Allow chocolate to set fully before decorating with colored chocolate or candy melts.
- Marshmallow sugar skulls: Mix crushed marshmallows into the sugar base for a softer texture.
- Vegan/egg-free skulls: Use aquafaba or vegan meringue powder alternatives for icing.
- Mini sugar skulls: Reduce size for cupcake toppers or candies.
- Sugar skull cupcakes: Pipe sugar-skull designs with fondant or royal icing on cupcakes.
Troubleshooting & Tips
Common issues
- Skulls collapse or are crumbly: Mixture too dry or insufficient packing — add a few drops of water and remold, pressing firmly.
- Skulls sticky or glossy: Excess moisture in the air; dry longer or use a low-humidity room.
- Icing runs or blurs: Icing too thin; stiffen by adding powdered sugar. Let base layer dry slightly before adding details.
- Colors fade: Use gel food colors for bright, saturated hues rather than liquid food coloring.
Pro tips
- Use gel colors for vibrant, non-watery colors.
- Work in small batches with piping bags to avoid icing drying out.
- Label edible vs non-edible decorations clearly at gatherings.
- Photograph your skulls in natural light for best online/portfolio presentation.
Storage & Shelf Life
Un-decorated, fully dried sugar skulls (kept dry) can last for months as decorative items. For edible skulls with icing, consume within 1–2 weeks if kept dry and wrapped in airtight containers. Do not refrigerate. If humidity is high, add silica packets (not touching food) in storage boxes for non-edible display pieces.
PrintCalaveras de Azúcar (Sugar Skulls): A Beginner’s Guide & Easy Recipe for Home Cooks in the USA

Learn how to make traditional Calaveras de Azúcar (Sugar Skulls) at home! This fun and colorful recipe is perfect for beginners and home cooks in the USA who want to create authentic, edible sugar skulls for Día de los Muertos or festive celebrations.
- Prep Time: 20 minutes
- Cook Time: 0 minutes
- Total Time: 12 hours (including drying)
- Yield: 6–12 sugar skulls (depending on mold size) 1x
- Category: Dessert / Cultural
- Method: No-Bake
- Cuisine: Mexican
- Diet: Vegetarian
Ingredients
- 3 cups granulated sugar (about 600 g)
- 3 teaspoons meringue powder (or 2 pasteurized egg whites)
- 3 tablespoons water (approx.)
- Gel food coloring (various colors)
- Confectioners’ sugar (for royal icing)
- Lemon juice or vanilla extract (optional, for flavor)
- Edible metallic leaf or luster dust (optional)
- Edible markers (for names)
Tools & Equipment:
- Sugar skull molds (plastic or silicone)
- Mixing bowls (medium and large)
- Electric hand or stand mixer
- Piping bags with small tips (#1–#3)
- Palette knife or small spatula
- Wax paper or parchment paper
- Cooling rack (optional)
- Small paintbrush (for luster dust)
Instructions
- Prepare workspace: Work in a dry area and line trays with wax paper.
- Mix dry ingredients: Combine sugar and meringue powder. Mix well.
- Add water: Add 3 tablespoons water gradually until the mixture clumps together without being wet.
- Pack molds: Press the sugar mixture firmly into skull molds. Smooth the tops.
- Unmold & dry: Flip molds onto wax paper and let dry 6–12 hours (or overnight).
- Prepare royal icing: Beat 3 cups powdered sugar, 2 tbsp meringue powder, and 3–4 tbsp water until stiff peaks form. Divide and tint with gel colors.
- Decorate: Pipe outlines and colorful details using royal icing. Add edible accents while icing is wet.
- Personalize: Write names on the foreheads with edible markers.
- Dry completely: Let skulls dry 4–6 hours before storing in airtight containers.
Notes
Work in a low-humidity area to prevent melting. Use meringue powder instead of raw egg whites for safety. Store dried skulls in a cool, dry place for up to 2 weeks. For classroom or family projects, prepare skulls ahead and let kids decorate.
Nutrition
- Serving Size: 1 sugar skull
- Calories: 150
- Sugar: 35g
- Sodium: 5mg
- Fat: 0g
- Saturated Fat: 0g
- Unsaturated Fat: 0g
- Trans Fat: 0g
- Carbohydrates: 38g
- Fiber: 0g
- Protein: 0g
- Cholesterol: 0mg